Making a 3-panel Top/Dress/Coat

me&3panel3ed

I recently posted photos and weaving details for a top I made myself on the Sewing for Weavers Facebook group and a member asked for the pattern.  So far as I know, this is an old traditional design that has a couple of advantages over a traditional 2-panel (front and back) or 4-panel (two fronts, two backs) design.  To weave it, the warp is narrower than for a 2-panel and slightly wider than for a 4-panel.  The former attribute means you can use a narrower loom.  I need a 28″ weaving width for a 2-panel top in most fabrics that shrink 10-15%, whereas I only need 18″ for 3 panels.  Given loom waste of a yard per warp, those 10″ less width saves me many yards of yarn!  That is important if using an expensive yarn, or one you have a limited amount of and can’t get more.  A 4-panel design is even less wide on the loom (14″ for me) but is another panel length longer.

To design a 3 panel top, measure the front width of a non-stretchy top that fits you well.  Double that number and divide by 3.  If you don’t have a top available, measure the bust/chest size, add at least 3″ for ease, and divide that number by 3.  The result is the finished width of each panel.  To that number you need to add shrinkage (minimum 10%, more for wool or unmercerized cotton) plus 1/2″ to 1″ take-up plus seam allowances.  Since your seams will be on selvedges, 3/8″-1/2″ is enough but there will be 2 seam allowances on each panel.  Determine how long you want the top to be, add shrinkage and take-up and a hem allowance for each panel. Set up the loom to reflect the total width and length needed.  If you want sleeves, add to the warp for those.

One panel will be the front and two will be the side/back pieces.  The latter will be seamed to each side of the front and then seamed together at the center back.  This is a great design to get fancy with the front piece (inlays, etc.) but weave quickly for the other two pieces.

3-panel top

I weave the front first, since I usually plan some kind of embellishment for it, then the other two pieces without embellishment.  Of course, you can plan something fancy all over!  Put a piece of waste yarn in a contrasting color to mark the end of each panel.  Remove from loom and secure ends, wet finish.  Pull out waste yarn, and machine stitch one each side of the gap.  Cut pieces apart and zigzag or serge ends.

Sew each side/back piece to the sides of the front.  Sew the center back seam.  For a crew neck, I fold a piece of paper in half length-wise and mark off an 8″ section.  Fold that in half.  On one side, draw a semi-circle from the 8″ mark on one side to a point 3-4″ down on the fold for the front neck patter, and on the other side to a point 1 1/2-2″ down for the back neck.  Cut along the semi-circles and unfold, making it a little more curved at the ends.  Below are photos of the front and back neck patterns on my top.

3paneltop4   3paneltop3

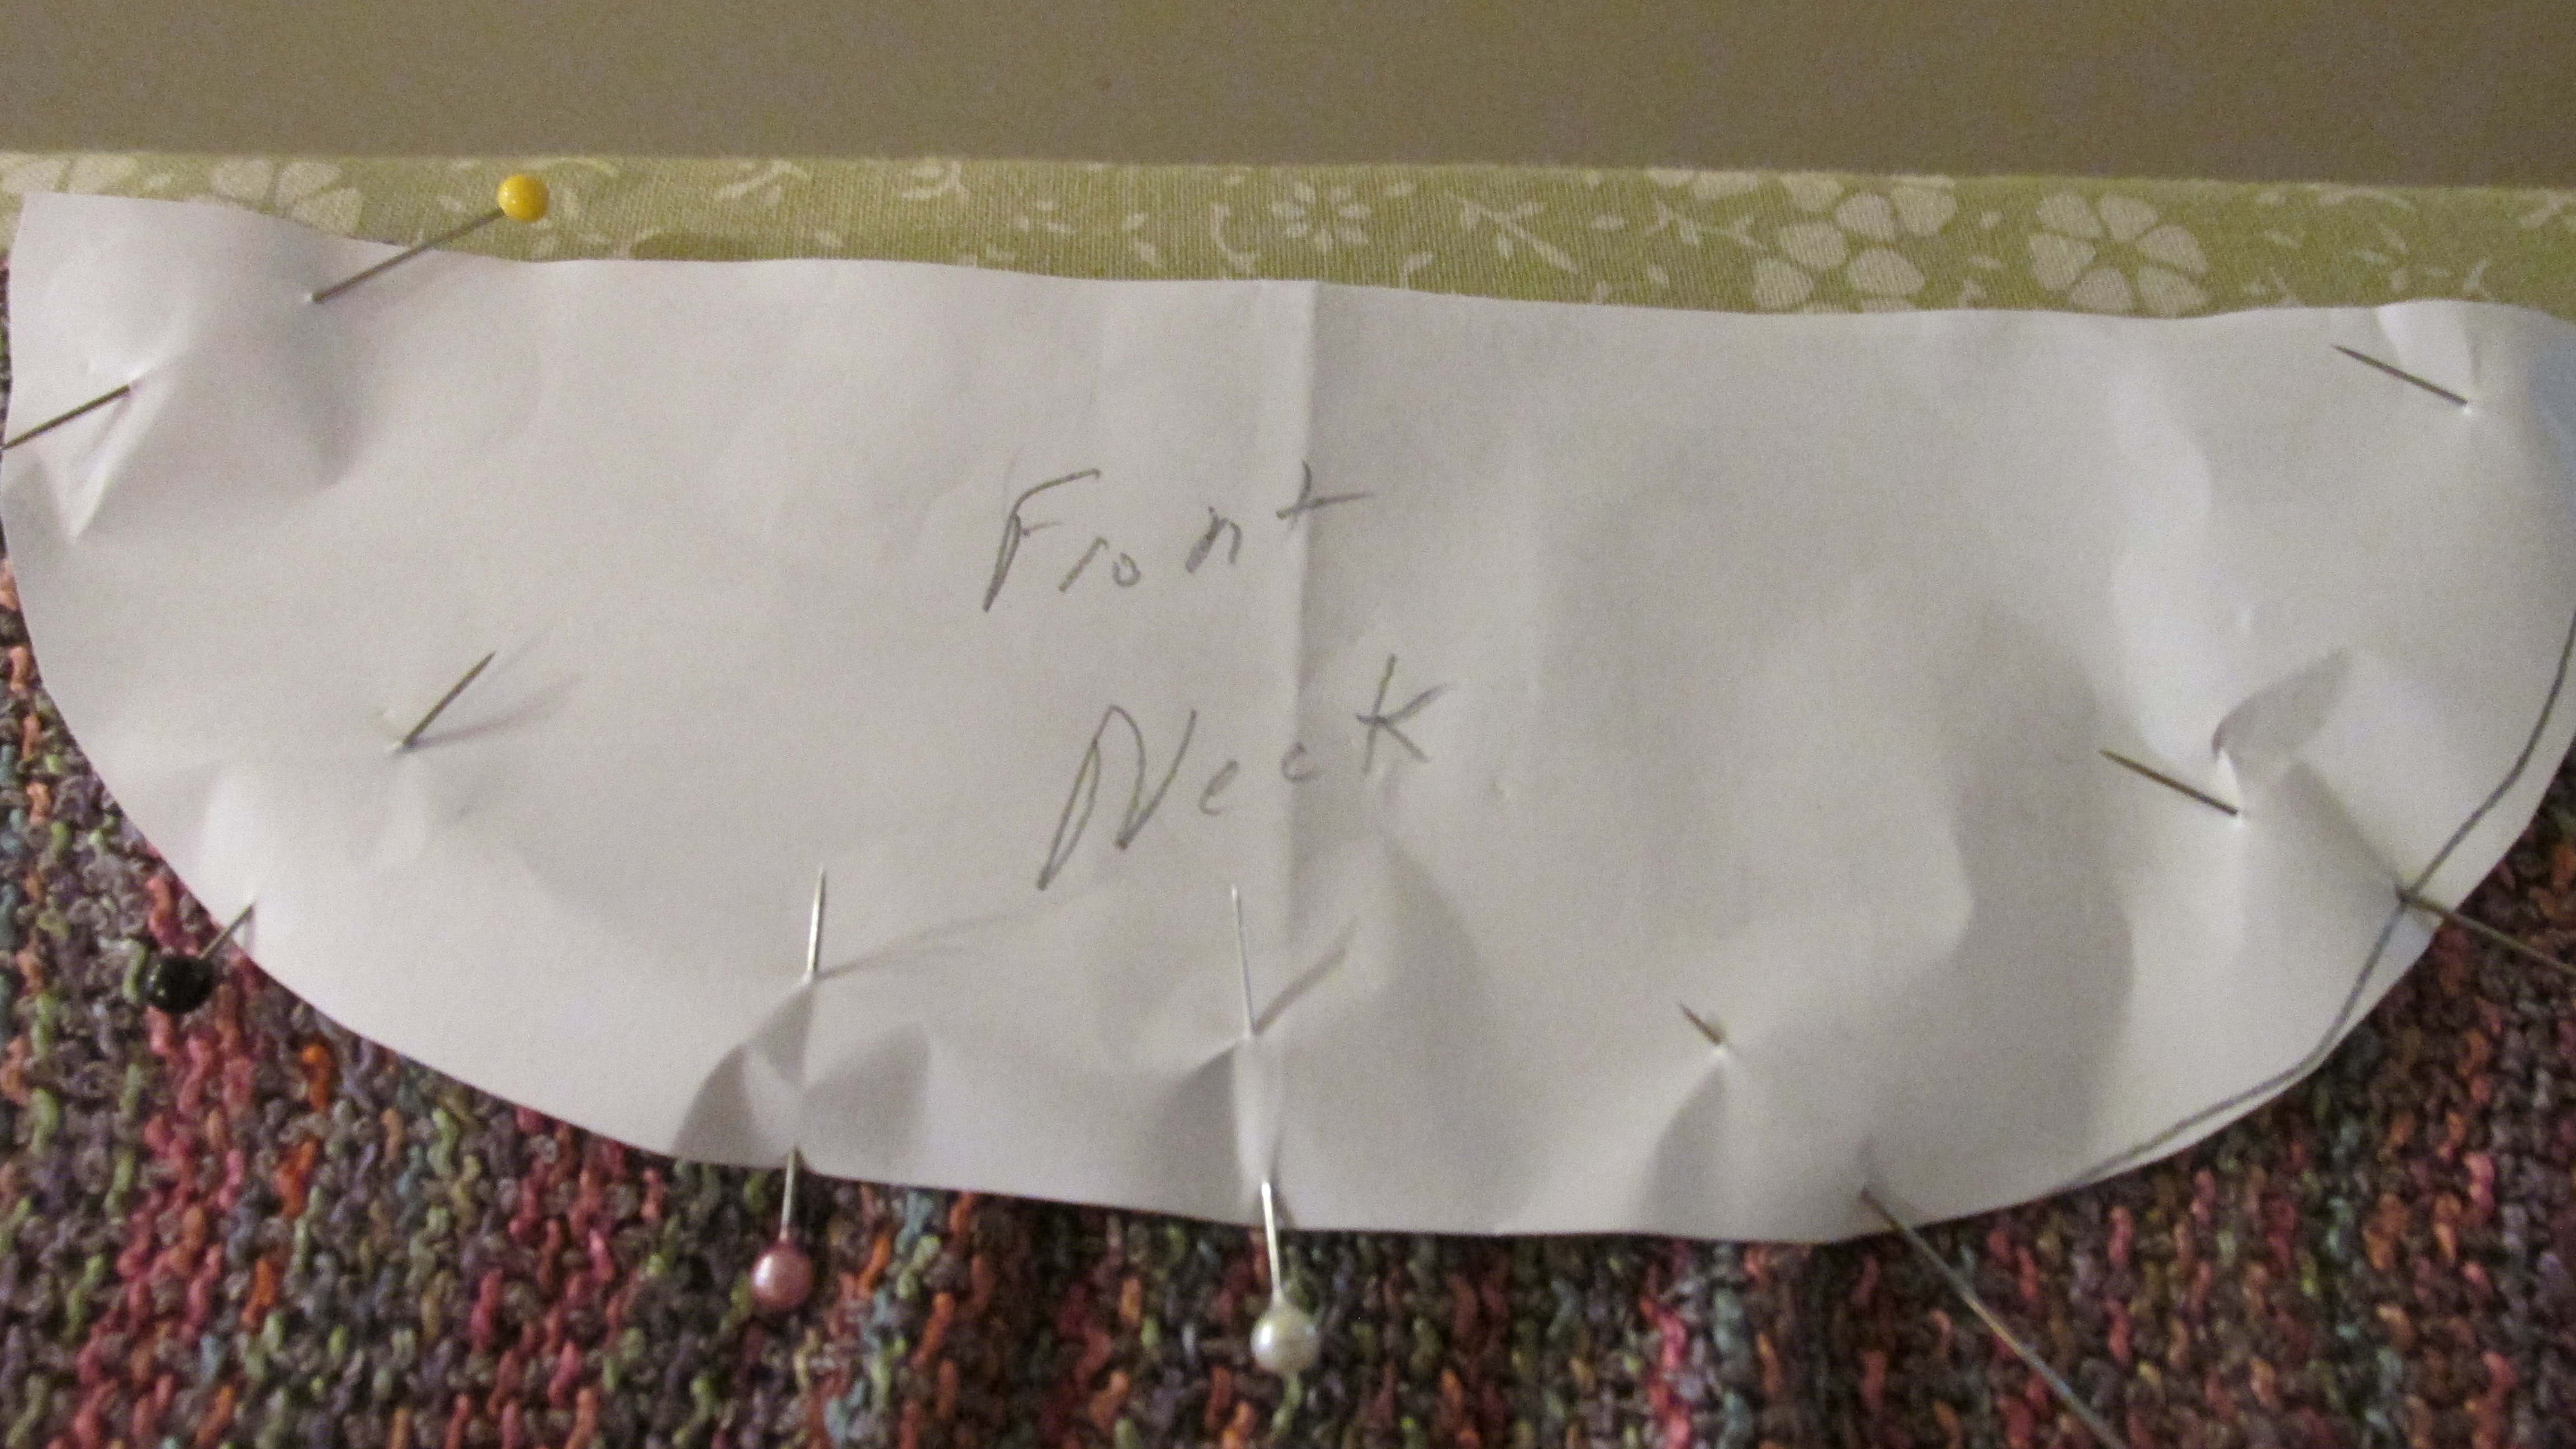
Machine stitch around the pattern, cut, and zigzag or serge edges.  Lay top on flat surface with center front and center back aligned at both neck and hem edges.  Pin along the fold at each side from the top down to the bottom of your armhole opening. (This depends on how thick your upper arms are and whether or not you will put in sleeves.  For a sleeveless top that will drop over the shoulders for a cap sleeve I allow 10″.  More if you have large arms or plan a set-in sleeve.)  Use tailor tacks, sewing marker, or pins to mark the line you need to cut.  Sew on either side of that line, cut the line, zigzag or serge.   Bar tack across the bottom of the cut.  Note that if the armhole is too small, you can always extend it by sewing down a bit further on each side.

Refer to the sketch above.  Turn the garment inside out, pin the shoulder seams from armhole to neck edge.  IMPORTANT!  Shoulders slant down from the neck to the shoulder joint.  Begin with a 1/2″ or 5/8″ seam allowance at the neck edge, then pin it down to about 1.5″ at the shoulder edge, so that your seam slants and you don’t get “wings” on your garment.

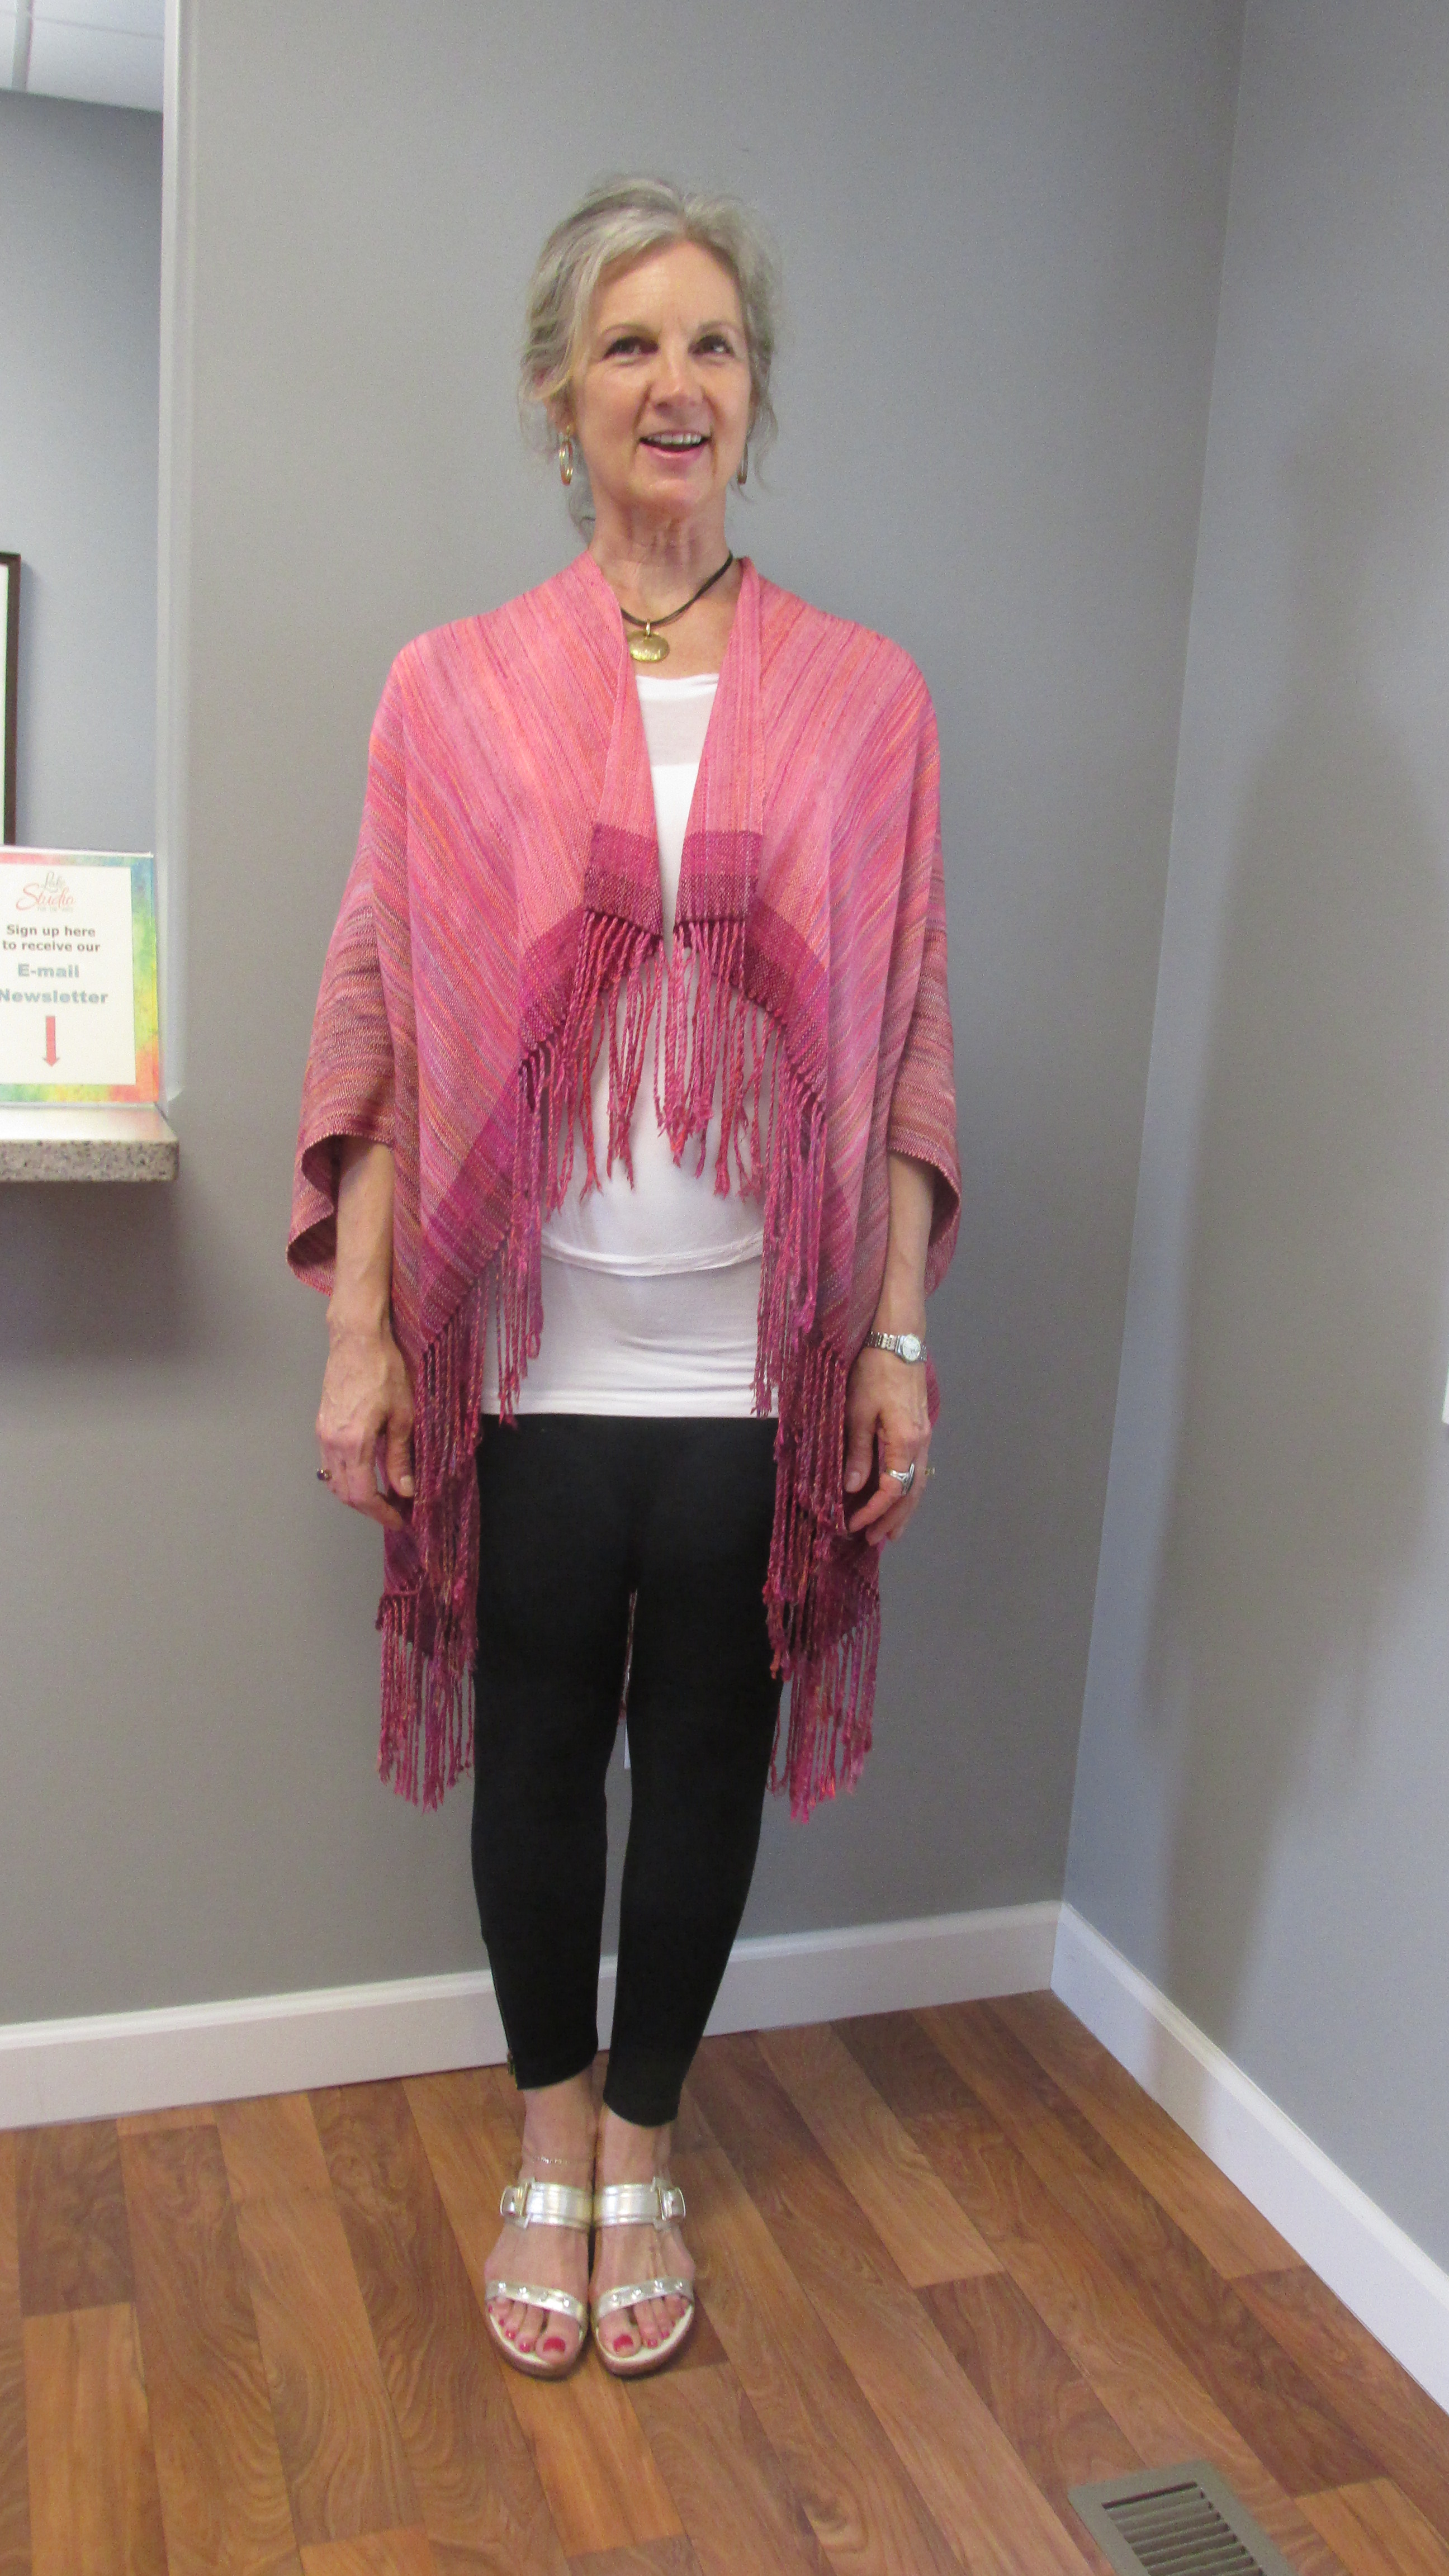
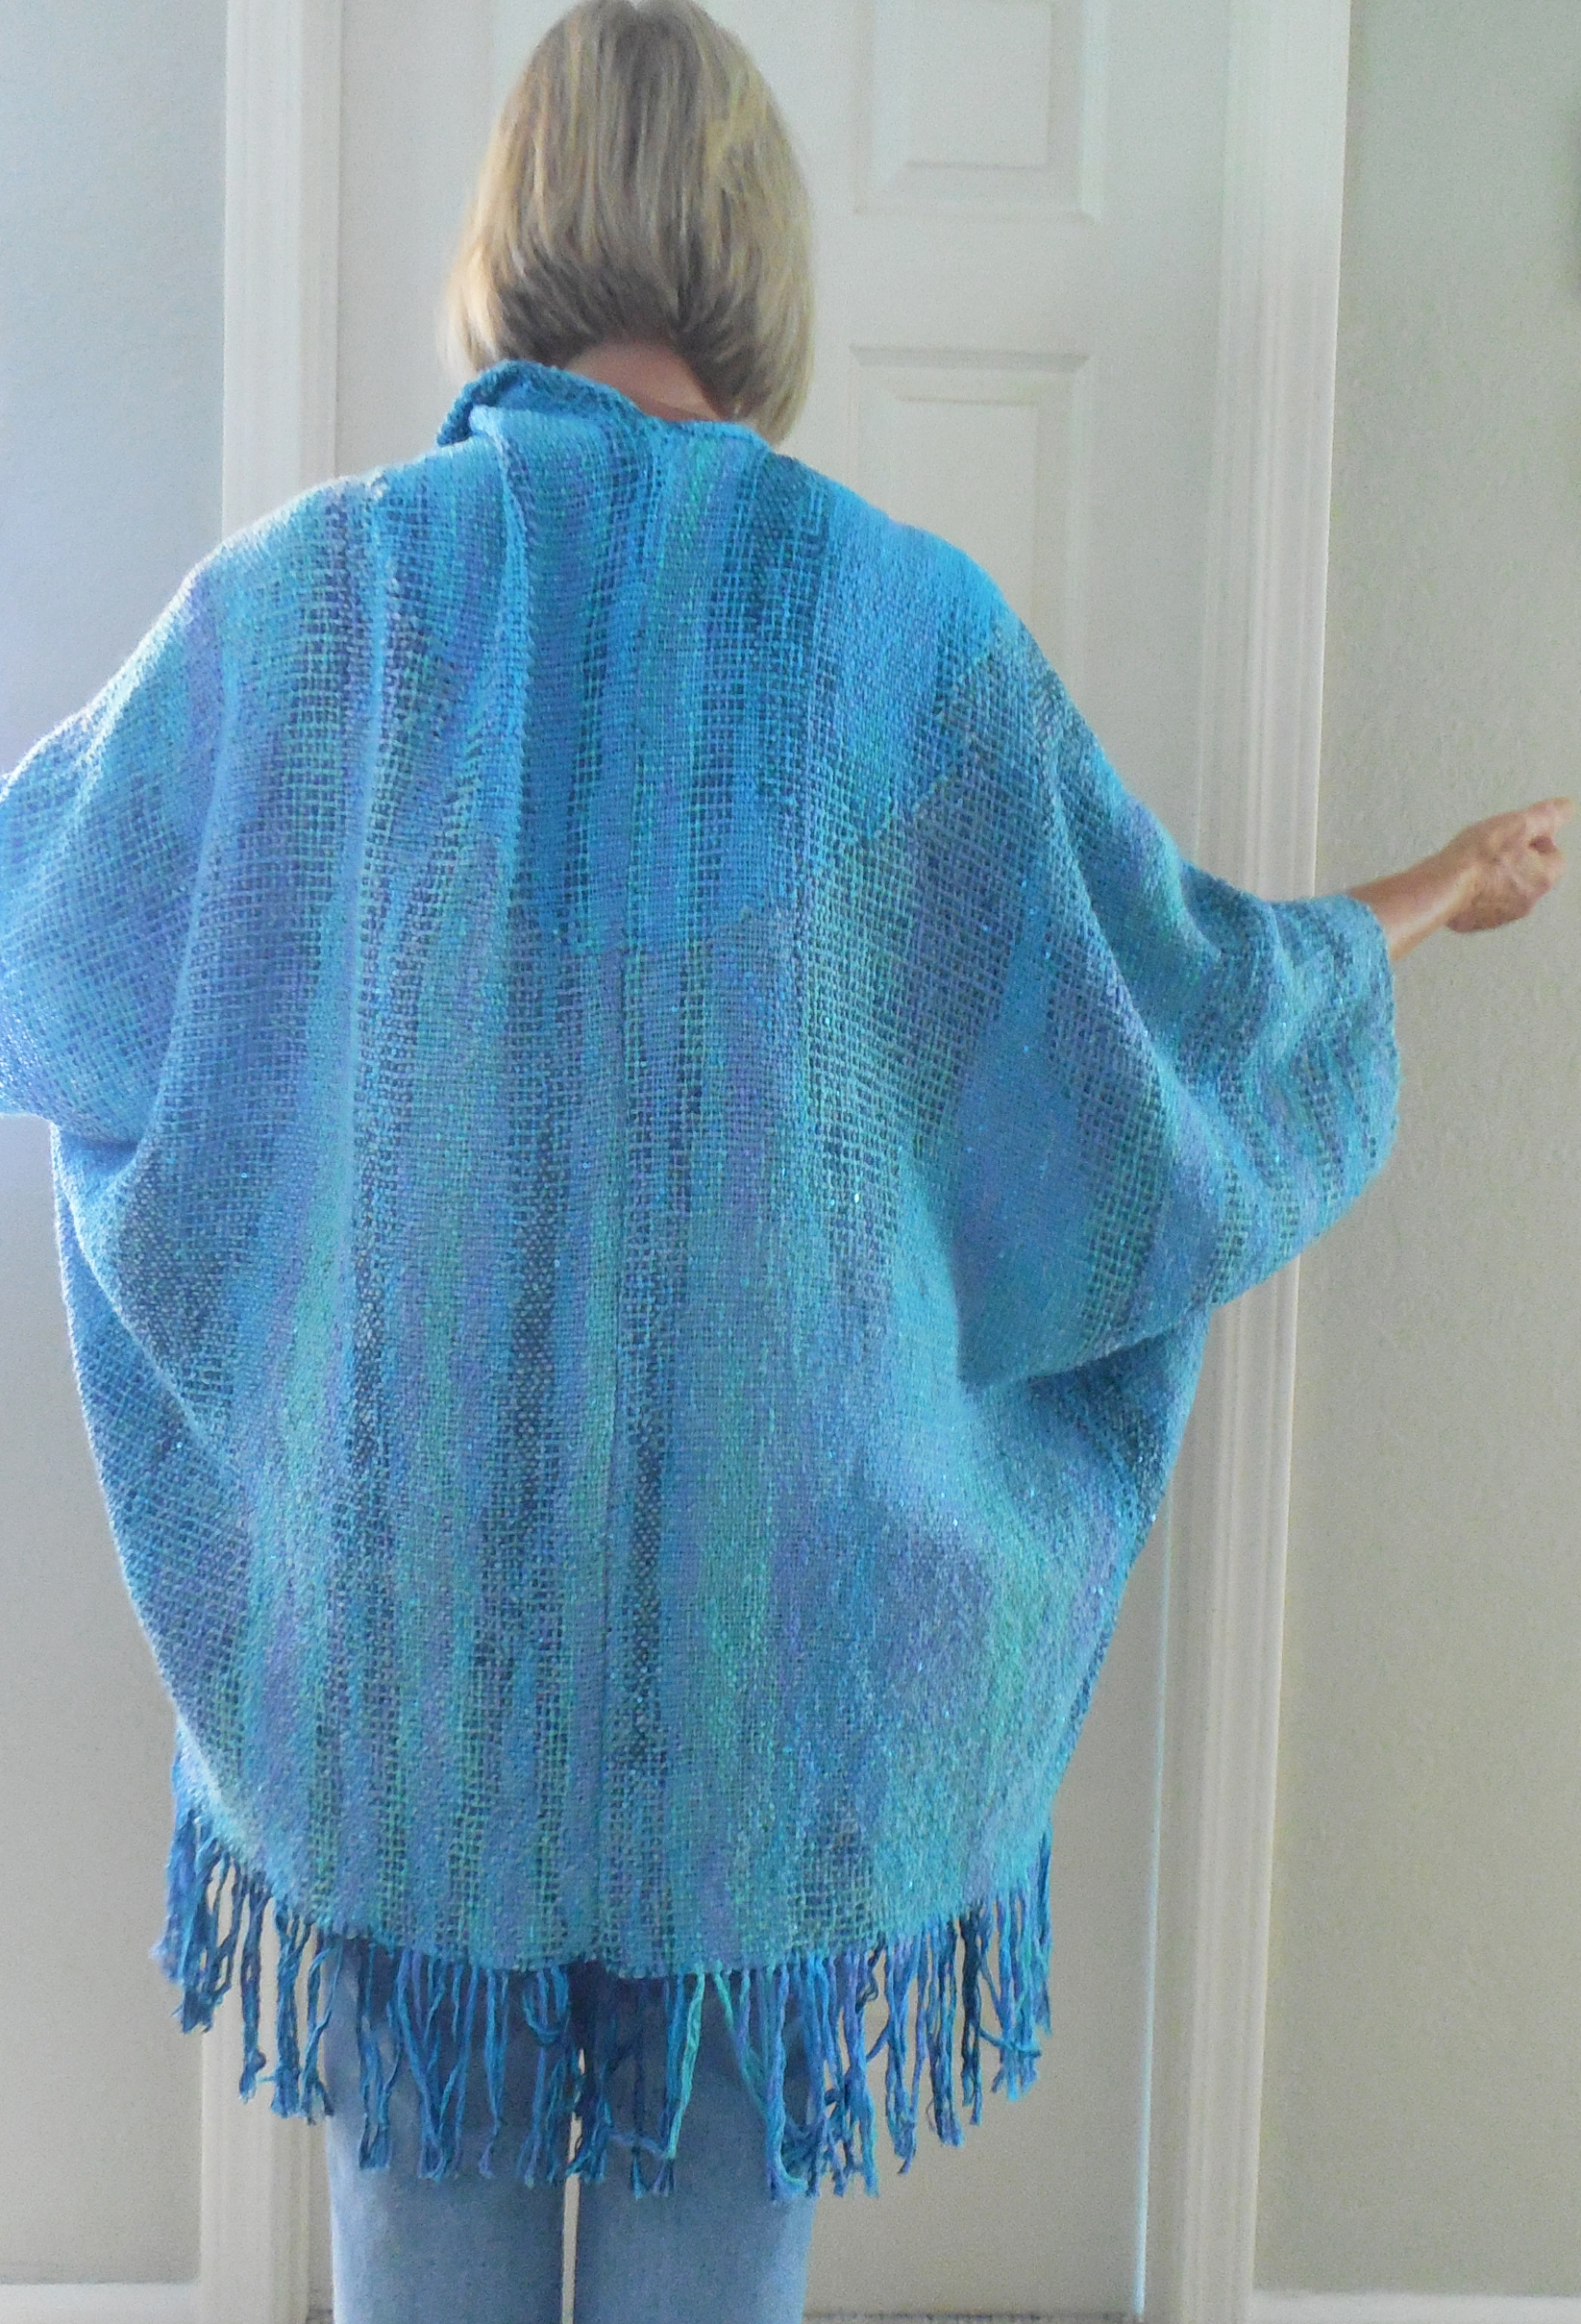
Finish all edges.  I usually narrow hem the neck edge and sleeves, and do a regular hem at the bottom.  In the example in the picture above, I turned under neck and sleeve edges, stitched, then used the darker weft yarn to crochet the edges.

A fun and easy garment with many possible variations!  E-mail me photos if you make one.


Advertisement
It’s official– I’m now a Master Weaver

It’s official– I’m now a Master Weaver

Friday, Nov. 4, I got the news that I had passed the examination for the Handweavers [sic] Guild of America’s Certificate of Excellence Level II– Master Weaver.  I got the first level certification in 2012, after 4 years of hard work.  This time it took me 2 years of full-time research and weaving.  The Level II is an individual research project, and mine was Weaving Clothing for Plus Size Women.  I read everything I could find on clothing design for sizes 14+, wove lots of samples to explore different weave structures I hadn’t previously tried, and evaluated them for suitability.  Some, like waffle weave, I hoped would provide stretchiness, and it did, but with too much bulk.  The motifs in crepe weaves were too small.  The final part of the research was to weave 3-5 “master works.”  I chose to do traditional weaverly garments: a bog jacket in handspun merino/tencel and silk (green), a vest in twill diagonals with insets at the sides (purple/blue/green), a kimono (the one shown was an earlier version in silk), a wrap with clasped weft inlay around the neck (gold/pink, shown below), and one non-traditional garment, a tunic in twill sewn on the bias (gold/white/brown stripes).

guild-show-diane3

Each garment was designed for a member of my guild who had one of five body types: A (hips wider), E (every body– the wrap), H (straight body), O (tummy bigger), and X ( hour glass shape).  Design elements were not meant to “slim” the look, but to create ease so the garment hangs well and fits properly.

It was a challenging project, and I thank all my friends, my partner Margaret, and even my cats for supporting me.  I hope to develop publications and workshops based on this research.

Save

Long Asymmetrical Wrap Design

I have had some requests from the weaving and sewing for weavers facebook groups to explain how I make long, flowing wraps like the orange and blue ones I posted recently. I call them asymmetrical because they are longer in the back than in the front.  This creates a unique drape, as much of the fabric is now on the bias.  It literally fits almost every body, from a size 0 up to a 3X.

orangewrapdebbie3

Orange wrap

bluewrap2-16-etsy

Blue wrap


The weaving is straightforward—two rectangles.  I make them a minimum of 24” wide (on-loom) up to about 30” wide.  The sleeves on the narrower rectangle hit at about elbow length, and with the wider rectangle about wrist length.  My preferred lengths (measured on-loom) are from 60” for average height, and up to 70” for a taller person.  Any weave structure that produces a fairly lightweight fabric with a good drape will do.  I have made it in wools with a very light, open beat, but I usually use cotton, rayon, or silk.

The asymmetrical “tilted” effect is achieved by sewing the two rectangles right sides together at the back seam for 2/3rds of the length, leaving only 1/3 open at the front.  I first saw a similar design, “Hapi Wrap” by designer Trish Lange, published in the Handwoven’s Design Collection 9: No Sew Garments (Interweave Press, 1988).  Hers was shorter and not as dramatically asymmetrical, but it gave me the idea of not stopping the seam at the shoulder.  After making a few weaving 60” long rectangles (measured on-loom), I tried one 66” long and liked the effect.  The two I showed on Facebook were woven 60” long due to lack of yarn, but when I have enough yarn I prefer the 66” length.  IMPORTANT: where the center seam ends at the back of the neck, the garment will be under strain.  Be sure to reinforce this area with a bar tack (sew across the seam for about ½” on each side and back stitch) or sew by hand with the weft yarn across the seam a couple of times.

If you are short on that special yarn, you can choose to hem the garment rather than have fringes.  As the weaving plan below shows, I usually leave a 14”+ section in the middle for fringes.  This is secured by weaving in a few shots of waste yarn at the end of rectangle 1, another few shots in the middle of the fringe allowance, and more just before weaving the second rectangle.  For hemming, add 1” at the beginning and end of each rectangle for hem turn under and eliminate the fringe allowance.  I usually twist the fringes, which takes almost as long as the weaving!

After sewing the center back seam, fold the piece in half at the shoulders and sew the sides together, leaving 10” open at the shoulder for the armholes.  Twist fringes or hem. Wet finish as appropriate to the fabric.

The large open space of this garment leaves lots of room for design possibilities.  On the blue wrap, I wove a free-hand circle around the neck using a darker weft, turning each weft around the other when they meet.  It is vital to measure carefully, since ½ the circle is on each rectangle.  I started the half circle at inch 10 (front)  and finished it at inch 30 (back) .  Other garments have had an inlaid design in the center back.  I made one using Theo Moorman technique to inlay Monet-like water lily sections randomly all over a watery space-dyed warp.

monetwrap12

Homage to Monet IV: Water Lilies Wrap

Very often I make a border, by simply weaving different wefts in stripes at the beginning and end of each rectangle, as seen in the orange wrap.  Again, careful measuring is essential so the stripes will line up at the center back and side seams.

Below is a weaving plan and illustration of how it is sewn.  My drawings are not to scale and pretty amateurish, but I hope you get the idea.  Happy weaving!  If you make one of these, please send photos.

long wrap weave plan

Save

Save

My short wrap weaving instructions

My short wrap weaving instructions

Melissa Woodruff of the Facebook group Sewing for Weavers has asked about this wrap since I posted a photo of it on the group.  This is a short version of my favorite garment– a much longer wrap.  I didn’t have enough of the lovely weft yarn so decided to create a somewhat different look with a shorter warp and with fancy yarn woven into the front.

This is a “low-sew” project– only three straight seams all on selvedges, so no special treatment needed.  You can see the center back seam in the photo.  There are two side seams that aren’t visible making sleeves.  The neckline is shaped on the loom and it and the hem edges are finished with crochet.  I would have hemmed the bottom but didn’t have sufficient yarn to make it long enough.  This is a “one-size-fits-most” garment.

I used a ramie/cotton green yarn rescued from unraveling a thrift store sweater for the warp, sett at 8 epi, width in reed 23″.   (I normally make my longer wraps at least 24″ and preferably wider, but again, lack of weft yarn dictated a narrower warp.)  The main weft is Filatura di Crosa “Cambridge”, a wool/mohair blend with a nylon binder.  The accent weft is “La Bohème,” which had several colors.  I was disappointed to find it was composed of  approx. 5 yard lengths of different yarns simply knotted together, so I cut it apart to use the kind of teal-bluish color only.  The clasp is an Art Deco antique I bought at a show a long time ago.

Here is the crudely-drawn, not to scale, weaving plan.  It is woven as two 44″ rectangles (all measurements are on-loom).  Draw a full-size cartoon for the decorative area that shouldn’t be wider than 4″  (mine was a simple stair step).  I make my cartoons on scrap fabric or on interfacing because paper tends to rip loose when you beat. Begin at the top of the diagram. (You can also weave this from the bottom up, just reversing the inches marks.)  This is plain weave, and with all wools I don’t really beat the weft, but gently snug it in so the garments feel light and airy.

short wrap weave plan

If you start weaving at the top, weave for 20″, then begin to weave the neck opening by using the main weft up to 4″ from the right selvedge, and use a second small shuttle or butterfly to weave in waste yarn or other spacer material from the selvedge to the 4″ mark.  Keep weaving the neck area for 4″ (you are now at inch 24 in your weaving).  Pin your cartoon for the inset accent design to the waste yarn area, weave 1 pick of main weft across from left to right selvedge and back to left selvedge.  Wind a second shuttle with the accent weft and begin weaving it from the right selvedge to meet the main weft coming from the left.  When the wefts meet, wrap the around, open the next shed, and return to the selvedges. Advance the cartoon as you weave.   Continue until you have woven the whole 44″ back/front piece.  Weave a line of waste yarn and start over doing the next piece, only making the neck at the left selvedge.

Remove from the loom, machine stitch around the edge of the neck opening, and remove the waste yarn and unused warps from that area.  Machine zig-zag the edges again.  Do the same for the hem edges and for the dividing line between the two rectangles and cut them apart.  Wet finish.  Sew the backs together at the center seam.  Fold at the shoulder line and leave an opening of 10″ from the fold.  Sew the side seams from there to the hem.  You can make the garment rectangles 4″ longer and allow for a turned-under hem, or you can encase the raw edges with crochet or with bias binding.

Let me know if you have questions and what you think of the wrap!  Happy weaving.

New Hand Weaving Blog

New Hand Weaving Blog

I am new to blogging and suspect I will make a lot of mistakes!  I don’t plan to post very often, but I do want to share some of the things I have learned over more than 20 years of weaving.  As you can see from my “About” page, I am a retired college professor now weaving full time.  I passed the examination for the Handweavers’ Guild of America’s Certificate of Excellence in Weaving in 2012.  This self-taught rigorous exam took 4 years of research and 40 weavings in every kind of structure.  I have done several presentations to my local guild, as well as teaching classes here in central Missouri.

My plan for the blog is to post two kinds of things.  One will be my presentations on topics such as using thrums (loom waste), reading drafts, making low-sew handwoven clothing, and more.  The other will be examples of my weavings with comments on techniques, weave structures, loom shaped clothing, etc.  My hope is to share what I have learned, to inspire newer weavers, and spark sharing of ideas through your comments.

The photo above is an old one showing a ruana in both handspun and commercial yarns.  I made it when I lived in Iowa, where the warmth was very welcome in winter!

I hope to post one of my presentations soon, so check back often.  Thank you.

Diane